Administrator's Guide
Installing Teams for JIRA Service Desk
Automated Installation
- In the upper right corner of JIRA, open the JIRA Administration Menu->Add-Ons
- Login with your JIRA credentials
- Search the Marketplace for Teams for JIRA Service Desk
- Click on the Teams for JIRA Service Desk listing to expand it
- Click on "Free Trial" to start a free 30 day trial of Teams for JIRA Service Desk to purchase a license. Both of these will download Teams for JIRA Service Desk to your instance.
- If you have already purchased a license, go to Manage-Add-Ons and locate the Teams for JIRA Service Desk Add-On after it has been installed. Click on the license key area and paste your license from the Atlassian Marketplace, then click "Update" to activate your license.
Initial Configuration
Before Teams for JIRA Service Desk can be used, some initial configuration is required.
Technical User
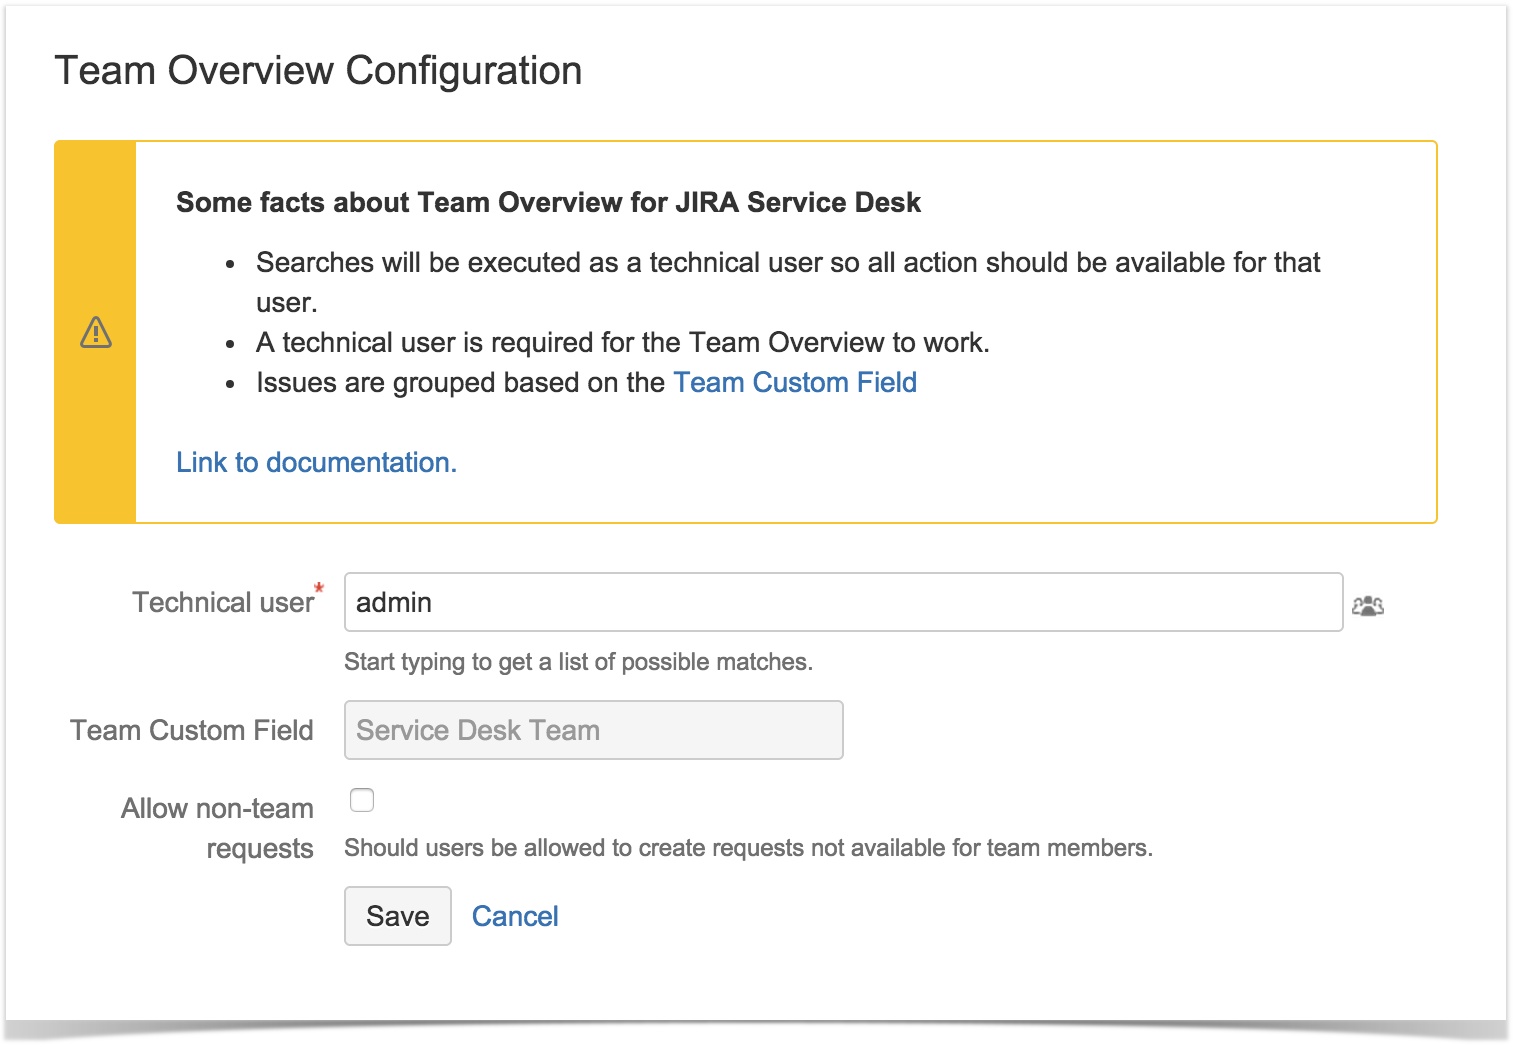
To perform some operations from the customer portal, a technical user is required. This technical user is used in API requests and requires agent access to your JIRA Service Desk project. To setup your technical account:
- In the upper right corner of JIRA, open the JIRA Administration Menu->Add-Ons
- Login with your JIRA credentials
- Browse to General Configuration in the Teams for Service Desk section in the left-hand menu.
- Use the 'user-picker' to select your Technical User
- Click Save.
Allow non-team requests
If the Team Custom Field is configured on an customer request type, all requests are by default available to the team. To allow the customer to create a private request, non-team requests can be enabled. To enable this feature:
- In the upper right corner of JIRA, open the JIRA Administration Menu->Add-Ons
- Login with your JIRA credentials
- Browse to General Configuration in the Teams for Service Desk section in the left-hand menu.
- Select the checkbox Allow non-team requests
- Click save.
Allow team invites
Its possible for a team lead to manage his team and add members to it. To invite not registered users, allow team invites can be enabled. To enable this feature:
- In the upper right corner of JIRA, open the JIRA Administration Menu->Add-Ons
- Login with your JIRA credentials
- Browse to General Configuration in the Teams for Service Desk section in the left-hand menu.
- Select the checkbox Allow team invites
- Click save.
Team Configuration
Teams are a flexible way to associate users and/or groups with to each other. Teams also allow for sharing Service Desk Requests between members.
Creating teams
To create a new team take the following steps:
- In the upper right corner of JIRA, open the JIRA Administration Menu->Add-Ons
- Login with your JIRA credentials
- Browse to Teams Configuration in the Teams for Service Desk section in the left-hand menu.
- Click the Add Team button in the top left corner
- Provide the team name and Save the team.
Managing team members
To change the team name or members:
- In the upper right corner of JIRA, open the JIRA Administration Menu->Add-Ons
- Login with your JIRA credentials
- Browse to Teams Configuration in the Teams for Service Desk section in the left-hand menu.
- Click on the usernames in the corresponding row
- Start typing a name to add the user to the team, or click on the X to remove a current team member
- Select update to save the changes.
Custom Field Configuration
In order for Teams for JIRA Service Desk to work, a managed custom field is automatically created upon installation of the add-on. This field is used to store for which team a request is created.
This custom field should be added to the create and view (and optionally edit) screen for your Service Desk agent and to the customer request type in JIRA Service Desk.
If the Service Desk Team field is not present on a customer request form no team is added to the issue and therefor it's not available for other team members.
Service Desk Configuration
Customer request forms
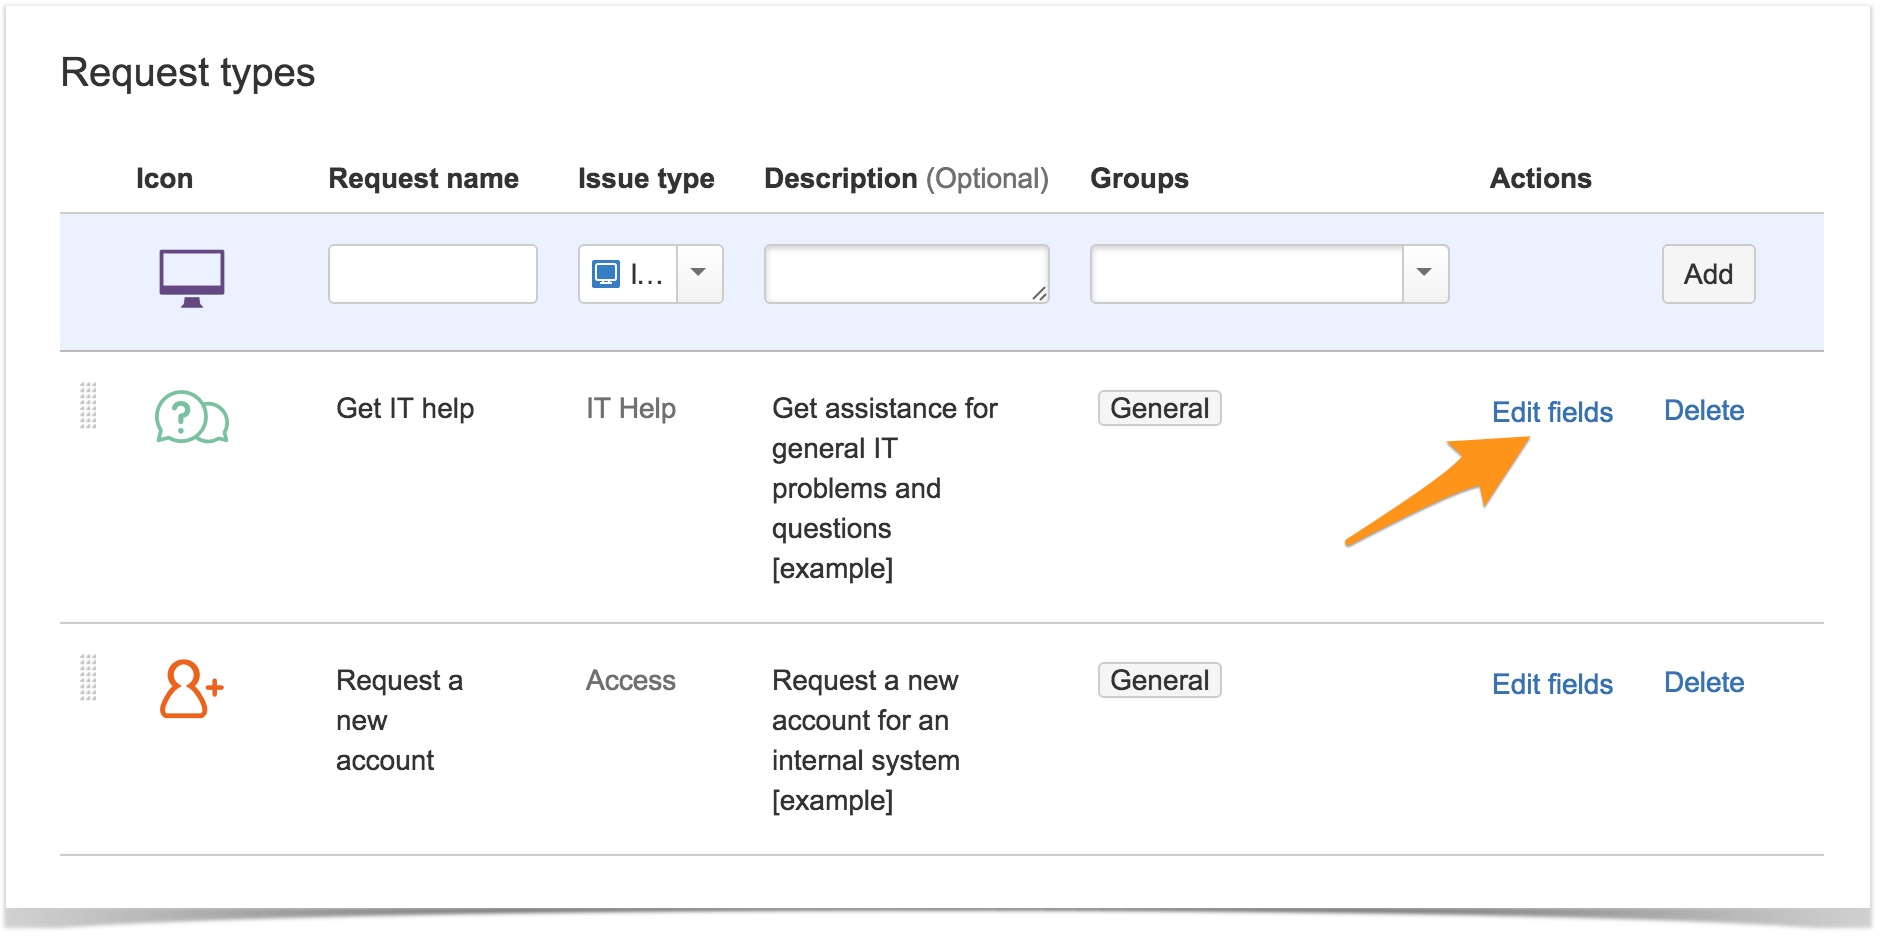
The Service Desk Team field should be added to you request forms.
- Browse to the request types of your Service Desk and click Edit fields
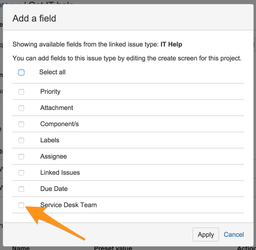
- Using the Add a field button:
- Select the Service Desk Team customfield and apply the changes
When the Service Desk Team custom field is added to the screen, it is only displayed when
- The customer is in multiple teams
- Non-team requests are enabled.
In other cases, the field is hidden from the customer and should be automatically filled
Enable Request participantsCustomers can only join (and participate) in team requests when Request participants is enabled for your service desk.
- In your service desk project, go to Settings > Request Participants.
- Set the setting Customers can add participants to their requests to On
Health check
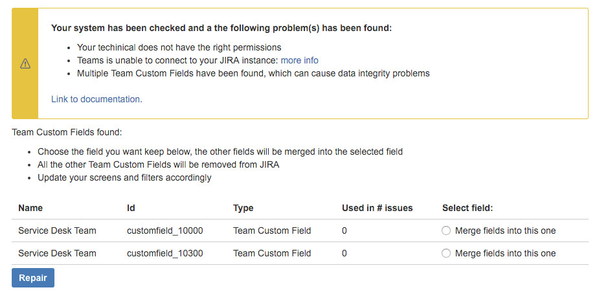
The followings possible problems can be found:
Your techinical user does not exists
Your techinical does not have the right permissions
Teams is unable to connect to your JIRA instance
Multiple Team Custom Fields have been found, which can cause data integrity problem
Technical user does not exists
This message is displayed when your technical user does not exists.
In order to fix this problem:
Browse to the Team Overview Configuration
- Check if the user you entered as Technical User actually exists
- Correct the technical user
- Press the Save button
Technical user does not have the right permissions
This message is displayed when your technical user does not have the right permissions.
In order to fix this problem:
Browse to JIRA user management
- Add the user you entered as Technical User to the jira-administrators group
Teams is unable to connect to your JIRA instance
This message is displayed when teams is unable to connect to your JIRA instance.
In order to fix this problem you have to make sure that your JIRA server is able to resolve your JIRA url. This can be solved using the following method:
Login to your JIRA server
- As a root user, open /etc/hosts –
vi /etc/hosts Add an entry
127.0.0.1 jira.example.com #this should be your url.
- Save the hosts file and refresh the health check
Multiple Team Custom Fields have been found
As the message tells multiple Team Custom Fields have been found which can cause data integrity problems. For every found custom field the number of issues which use the specific field are listed.
In order to fix this problem:
- Select the field you want to keep and where all the other fields their data will be merged into.
- Press the Repair button
- A screen will be displayed where is explained which fields fields have been deleted and merged.
- Press the Acknowledge button
Configure the 'Service Desk Team' field via a Post-function
Assign issue to Service Desk Team lead
Assign the issue to the lead from the Service Desk Team. Please note that the issue will only be assigned to the team lead user if the user has the 'Assignable User' permission.
- In the upper right corner of JIRA, open the JIRA Administration Menu→Issues.
- In the menu under the section WORKFLOWS click on Workflows.
- Click on edit for the workflow which you would like to change.
- Click on the transition you would like to change.
Under Options choose Post Functions.
Select Teams - Assign to Team lead.
Press the Add button.
Update Issue Service Desk Team
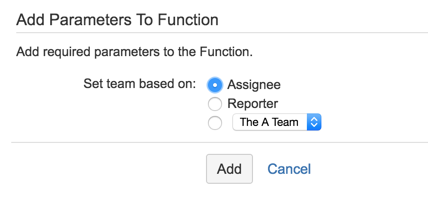
Updates the Service Desk Team field based on the option chosen.
- In the upper right corner of JIRA, open the JIRA Administration Menu→Issues.
- In the menu under the section WORKFLOWS click on Workflows.
- Click on edit for the workflow which you would like to change.
- Click on the transition you would like to change.
Under Options choose Post Functions.
Select Teams - Update Team Value.
Press the Add button.
Specify whether you want the team set based to the assignee's or reporters team or a specific team.
Press the Add button.
